
Vortex Mod Manager is a popular mod management utility tool. It lets you easily install and manage mods from the Nexus Mods platform.
Vortex is a powerful tool designed specifically to download, manage, or even upload mods from the large collection of available games.
Due to its intuitive design and functionality, Vortex has become the primary mod manager by Nexus Mods. It has a massive collection of games with hundreds of specific mods.
If you’re looking for a step-by-step guide to install and use the Vortex mod manager.
Then, follow through the article, as we will cover all the details you need to get started with Vortex Mod Manager.
How to Install Vortex Mod Manager?
Vortex Mod Manager is a free-to-use mod management tool, created by Lanin specifically designed to install and manage mods. Vortex is integrated with Nexus Mods and is their default mod management tool.
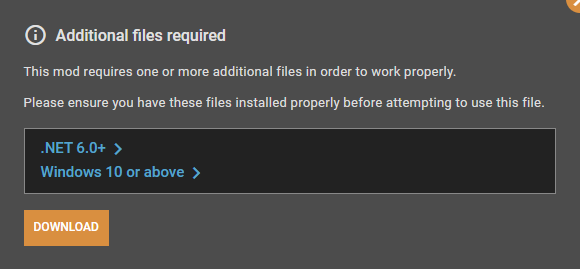
The Vortex Mod manager is available on the Nexus Mods official website and can be easily installed from there. However, there are a few requirements which are needed to run the tool, so make sure your PC meets the given requirements:
- .NET 6.0 Desktop Runtime or above framework
- Windows 10 or above
If your PC meets all the requirements, you can follow the steps to install the Vortex Mod Manager.
- Firstly, go to the homepage to download the Vortex Mod Manager. Now click on the Download button.

- A pop-up will appear with file requirements information. As we have already fulfilled them simply click on the download button.
- Now you will be asked to log in to continue the download. Click on login and enter your login credentials.

- If you don’t have an account yet, simply click on Register here to create an account.
- Once you log in, it will start downloading the Vortex Mod file.
- When the downloading is done, click on the Vortex installer file and follow through the on-screen prompts.
- Select the location where you want to install the Vortex Mod Manager and then click on Next.

- This will automatically start the installation and when it’s completed, click on the Finish button.

How to Use Vortex Mod Manager?
Once you’ve installed the Vortex you can click on the Vortex icon to open the Mod Manager.
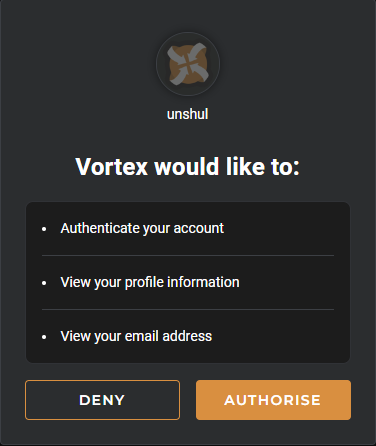
- To start installing the mods, you will have to log on to your Nexus Mod account.
- You can do so by clicking on the profile icon at the top right corner. It will open a tab on your browser where you can authorize your account.
- On the homepage, you can see multiple panels that show your managed mods, extensions, guides, tutorials, the latest news, and much more.

- On the homepage, you can see multiple panels that show your managed mods, extensions, guides, tutorials, the latest news, and much more.
- On the left sidebar, you can see options for Downloads, Games, Mods, Extensions, and Settings.
Install Mod in the Vortex Mod Manager
Installing a mod on Vortex Mod Manager is a pretty simple process that can be done within a few clicks. Here’s how you can do so:
- To install any mods, you must manage the game for which you want to install the mods.
- Open the Games tab from the sidebar and here you can see all the games available in the Vortex Mod Manager.
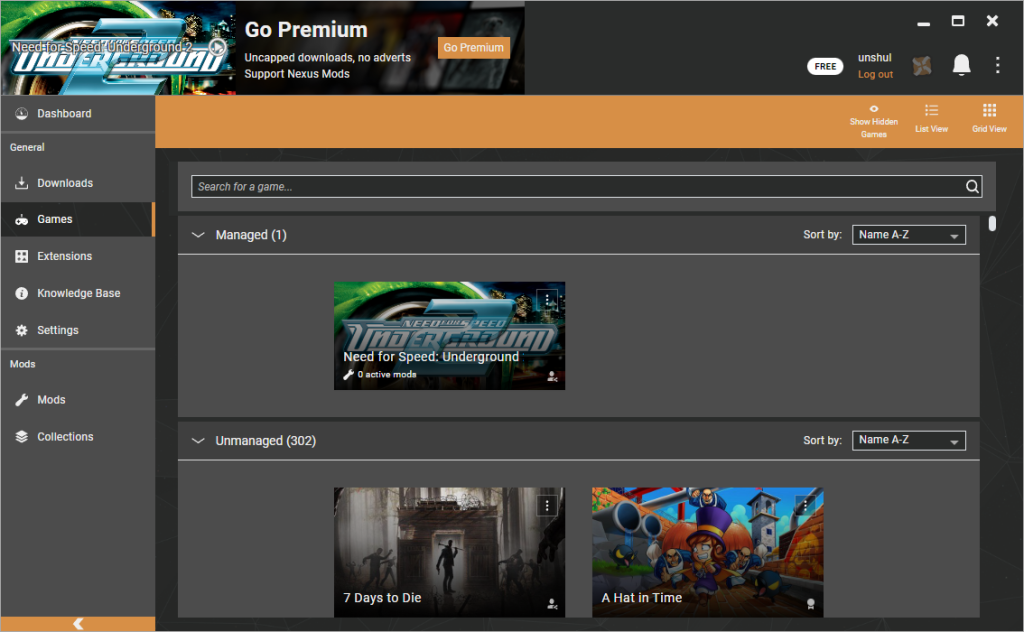
- You can also search through the game library. Once you find the game, simply click on Manage to start managing it.
- If the game is already installed on your PC, Vortex will automatically detect the game folder. In case, it does not you can also do it manually by selecting the game folder.
- Once you’re done with selecting the game you can now install the mods for it.
- Open the official website of Nexus Mods and search for the game you want to mod.
- You will see a list of available mods on the search bar. From there select the mod you want to download.

- Once you select the mod, you can see its complete details. Click on the Vortex button to download the mod directly from Vortex.

- If this option is not available for the mod you’ve selected. In that case, you can download it manually and then, install the mod on vortex.
- Now open the Mods tab from the sidebar to look for the downloaded mods.
- If you have manually downloaded it you can click on “Install with File” to install the mod.

- Under the Status bar, you can see the status of a particular mod.
- If you haven’t installed the mod yet it will show the status as Not Installed.
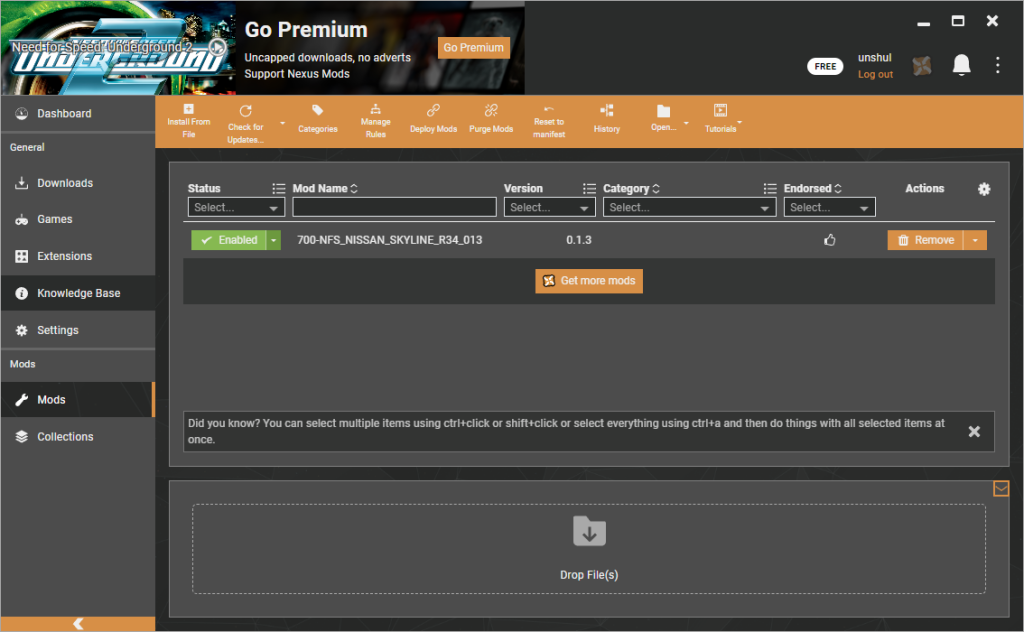
- From the dropdown click on Enabled to start installing the mod.
This will activate the mod and you can open the game to see if it’s working or not. Similarly, you can install as many mods as you want.
Conclusion
So, this is how you download and use Vortex Mod Manager to install your favorite game mods.
Vortex Mod Manager is a powerful tool that allows users to install and manage mods. If you’re a hardcore gamer and use mods quite regularly, Vortex Mod Manager can save you a lot of hassle.
It has some of the most powerful features and its user interface makes it easier to navigate through the tool even if you’re a complete beginner. It’s an official mod manager from the Nexus mods so, it’s completely secured as well.
We hope this guide helped you clear your doubts regarding the Vortex Mod Manager. If still have any feel free to comment down below.